 by
by The Alpbach Valley — nestled in the Tyrolean Alps of Austria — offers a near-perfect setting for night sky photography. With minimal light pollution, dramatic mountain silhouettes, and crisp alpine air, it’s a dream canvas for capturing stars, the Milky Way, and celestial events. Whether you’re a seasoned astrophotographer or an enthusiastic beginner, this guide will walk you step-by-step through planning, equipment, technique, composition, and post-processing so you can return home with breathtaking night sky images from the Alpbach Valley.
1. Why the Alpbach Valley Is Ideal for Night Sky Photography
Before diving into techniques, it helps to understand why the Alpbach Valley is special for astrophotography:
🌌 Low Light Pollution
Compared to urban centers or even many European tourist hotspots, the Alpbach Valley enjoys significantly darker skies. Small villages and strict lighting ordinances help preserve night darkness — a huge advantage when shooting stars and the Milky Way.

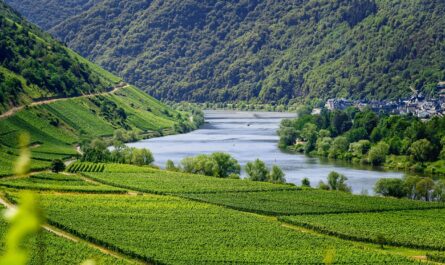
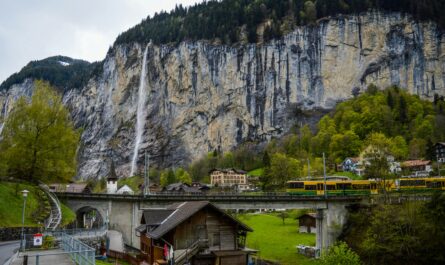
🏔 Majestic Natural Backdrops
Crisp mountain ridges, alpine pastures, and the valley’s characteristic timber architecture provide striking foregrounds. A composition that includes both landscape and sky elevates your images from standard star shots to wow-factor photographs.
🍃 Clear Alpine Air
Higher elevations and less atmospheric haze mean sharper star details and more vivid night sky contrast — especially if you climb to a higher vantage point like Wiedersberger Horn or Gmahkopf.
2. Understanding the Night Sky: Basics You Should Know
Astrophotography isn’t random clicking — it’s about timing, pattern, and light.

🌠 Key Astronomical Concepts
- Milky Way Core Visibility: The core of our galaxy — the brightest area — is most visible from late spring to early autumn (roughly April to October in the Northern Hemisphere).
- Galactic Rotation: Stars appear to rotate around the celestial poles; longer exposures will produce “star trails.”
- Moon Phases: A bright moon can wash out stars. New moon nights are ideal for deep sky shots.
🛰 Useful Apps
There are great astronomy planning apps (e.g., Stellarium, PhotoPills, Sky Guide) that can help you:
- Predict Milky Way position
- Track moonrise and set times
- Find celestial events (meteor showers, conjunctions)
These tools are especially helpful in mountainous terrain like Alpbach, where horizons can be blocked by peaks.
3. Planning Your Shoot
Great astrophotography starts long before you pick up your camera.
🗓 Choose the Right Time
- Moonless Nights: Aim for nights around the new moon for maximum star visibility.
- Season: Summer to early fall is best for Milky Way core shots in this region, but winter can offer crisp skies and star trails over snowy peaks.
- Weather Forecast: Clear skies are a must. Mountain weather changes rapidly, so check local mountain forecasts, not just general forecasts.
🚗 Reaching the Best Spots
Alpbach village itself is charming, but for night sky photography you’ll likely want less ambient light:
- Alpbach heights near Inneralpbach
- Reither Kogel ridge
- Gmahkopf lookout points
- Valley passes and alpine meadows
Always plan your route before dark and ensure you have safe, accessible terrain.
4. Gear Checklist: What You Need
Astrophotography doesn’t have to be expensive, but having the right tools makes a huge difference.
📸 Camera
- DSLR or Mirrorless: Full-frame sensors perform best in low light, but crop sensors work too.
- Manual Mode: Auto modes won’t cut it once you’re photographing stars.
🔭 Lenses
- Wide-angle lens: A focal length between 14mm and 35mm lets you capture more sky.
- Fast aperture: f/2.8 or wider is ideal for gathering starlight.
🎛 Essential Accessories
- Sturdy Tripod: Night photography means long exposures — no camera shake allowed.
- Remote Shutter or Intervalometer: To avoid touching the camera during exposures.
- Extra Batteries: Cold nights drain power faster.
- Headlamp with Red Light: Preserves night vision while you adjust settings.
📱 Optional but Useful
- Star tracker: For deep sky imaging without star trails.
- Flashlight or lantern: For lighting foregrounds or light painting.
5. Camera Settings: The Foundations
Here’s a reliable starting point for your night sky images — then we’ll refine it for creative control.
📷 Basic Settings
- Mode: Manual (M)
- Aperture: Widest available (f/2.8, f/1.8, etc.)
- ISO: 1,600–6,400 (higher for darker skies, but watch noise)
- Shutter Speed: 10–30 seconds (depending on focal length)
⭐ The “500 Rule”
To avoid star trails without a tracker, you can use the 500 Rule:
Maximum Exposure (seconds) ≈ 500 ÷ focal length (mm)
So with a 20mm lens:
500 ÷ 20 = ~25 seconds
This gives a safe exposure before stars begin to trail.
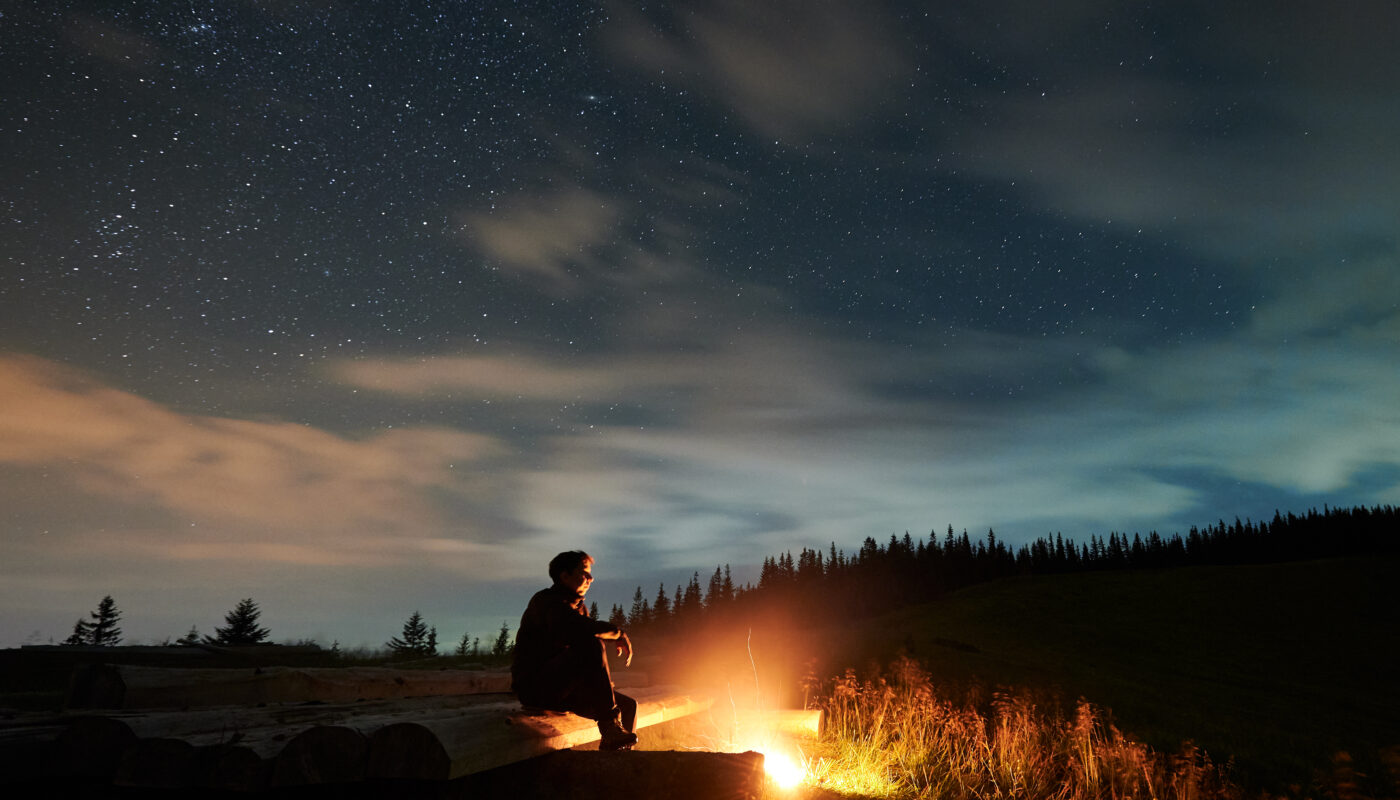
6. Composition Tips: Integrating Earth and Sky
Beautiful night sky images often combine celestial grandeur with a striking foreground.
🏔 Foreground Elements
Look for:
- Mountain silhouettes
- Lakes reflecting stars
- Alpine huts or fencing
- Trees or rocky outcrops
✨ Lead the Eye
Use foreground elements to lead the viewer’s eye into the sky. For instance:
- A path toward the horizon
- A lone cabin beneath the Milky Way
📐 Rule of Thirds
Place your horizon on the lower third if the night sky is your star subject, or higher if foreground drama is strong.
7. Capturing the Milky Way in Alpbach
The Milky Way’s core is the brightest portion and the most sought-after target.
🌌 Best Timing
- Late spring to early fall: The core is visible above the horizon after astronomical twilight.
- Late evenings: In summer, the Milky Way rises higher in the sky after 10 pm.
📸 Exposure Tips
- Start with 20–25 seconds exposure at ISO 3,200 and adjust based on brightness and noise.
- If the foreground is too dark, consider light painting with a flashlight.
8. Star Trails: Painting with Time
While pinpoint stars are popular, long exposures can create breathtaking star trails — arcs that trace Earth’s rotation.
🕐 How to Shoot Star Trails
- Shutter: Use a series of long exposures (e.g., 30 seconds each) back-to-back for 30–60 minutes or more.
- Stacking Software: Combine your sequence in software later to produce smooth trails.
- Foreground Considerations: Fixed foreground lighting helps anchor the trails.
9. Dealing with Challenges
Astrophotography is rewarding but not without obstacles — especially in alpine environments.
❄️ Cold Weather
Battery life and LCD screens perform poorly in low temperatures. Keep spares warm in a pocket.
🌬 Wind
Even small vibrations during long exposures blur images. Use a weight on your tripod (like a backpack) to stabilize it.
🌫 Humidity and Dew
Condensation on lenses at night is common. Bring lens cloths and consider a lens heater if it’s very dewy.
10. Post-Processing: Making Your Images Pop
Raw images straight from the camera are only the beginning. Editing brings out the stars and highlights details.
🖥 Basic Workflow
- Import RAW files — RAW retains more data than JPEG.
- Adjust White Balance — Night sky images often look cooler; adjust for mood.
- Noise Reduction — High ISO introduces noise; address this carefully.
- Contrast and Clarity — Boost mid-tones and contrast to add depth to the Milky Way.
- Highlight Recovery — Bring back details in bright stars and foreground.
📌 Stacking Software
For star trails or deep noise reduction, use stacking tools like:
- Sequator
- Starry Landscape Stacker (Mac)
- Adobe Photoshop
11. Safety and Respect for Nature
When photographing in remote or dark areas:
🌲 Safety First
- Let someone know your plan and return time.
- Bring warm layers, water, and basic emergency supplies.
- Be cautious on uneven terrain or steep overlooks.
🌍 Respect Wildlife and People
- Avoid bright white lights — use red light to preserve night vision.
- Respect private property and local wildlife habitats.
12. Sample Night Sky Locations in Alpbach Valley
Here are some standout spots worth exploring:
🏞 Gmahkopf Ridge
Offers wide sky views and dramatic ridge lines — ideal for Milky Way panoramas.
🌌 Inneralpbach Meadows
Open meadows create excellent foregrounds and low horizons for sky dominance.
🌠 Reither Kogel Overlooks
Provides higher elevation vantage points for both star fields and valley lighting.
🌄 Wiedersberger Horn Trails
Higher elevation trails give crisp sky images above valley light glow.
13. Inspiration and Creative Ideas
Once you’ve mastered the basics, challenge yourself with creative approaches:
📷 Time-Lapse Sequences
Capture the movement of stars and bring the night sky to life as motion.
✨ Foreground Lighting
Experiment with gentle light painting to illuminate huts, rocks, or trees.
🌒 Celestial Events
Plan your trip around:
- Meteor showers (Perseids, Geminids)
- Galactic alignments
- Moonrise over peaks
These events add storytelling elements to your astrophotography.
14. Final Tips for Success
🌟 Scout locations during the day
🌟 Use a reliable planning app
🌟 Pack extra batteries and memory cards
🌟 Practice manual focus — autofocus won’t work at night
🌟 Stay patient — night photography rewards persistence
Conclusion
Photographing the night sky in the Alpbach Valley is an unforgettable experience that blends technical skill with artistic vision. With its dark skies, alpine silhouettes, and dramatic seasonal skies, the valley offers an ideal setting for capturing celestial beauty. Whether you aim to immortalize the Milky Way, create sweeping star trails, or tell visual stories with mountain foregrounds, this guide equips you with the tools, techniques, and inspiration to succeed.
So set your tripod, find your composition, and let the stars over Alpbach guide your shutter. The night sky is waiting.